導入と最初のプロジェクト・ChatGPTにグラフィックを書かせる
導入
最初のプロジェクト
必要なもの
最初の一歩・プロンプトの作成のための準備
create table mUserInfo
( vcUserId varchar(32) not null comment 'ユーザーID'
,vcPassword varchar(32) not null comment 'パスワード'
,vcUserName varchar(50) not null comment 'ユーザー名'
,intOrganizationId int not null comment '所属組織ID'
,tiSysAdmin tinyint not null comment 'システム管理者権限'
,tiSessionLimit tinyint not null comment 'セッションリミット数'
,tiNotificationLevel tinyint comment '通知を送るアラートレベル'
,primary key( vcUserId)
)comment='ユーザー情報';
このテーブルを表形式で表示して
項目からデータ型を消して
これも難なくクリアです。
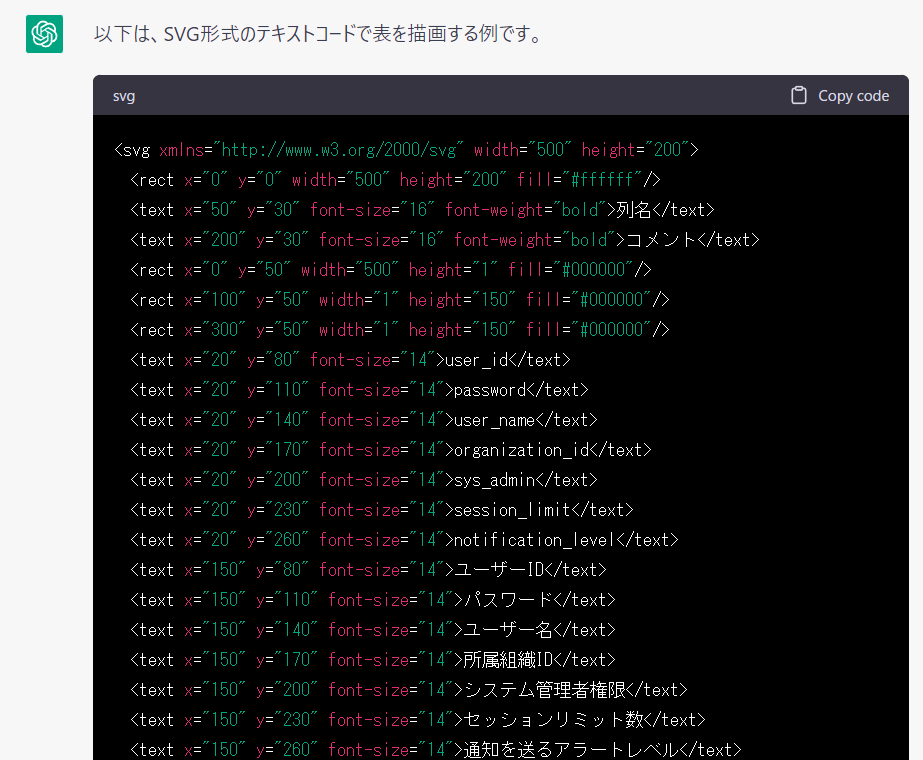
この表をSVG形式でテキスト出力してください。
SVG形式画像のテキストをコードで表示してほしい
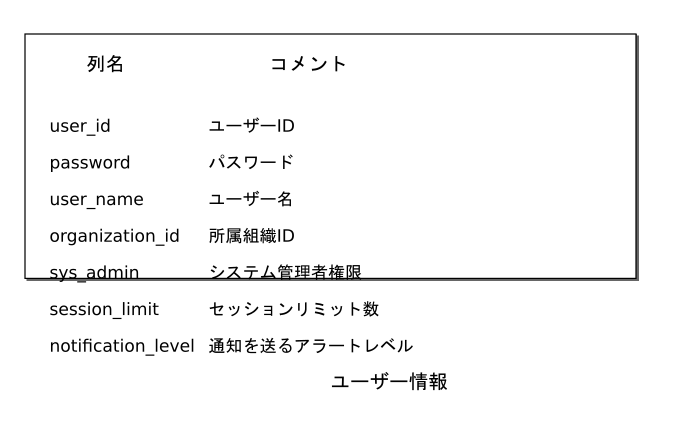
今度はちゃんと出してくれました。以下、ChatGPTはSVGコードを出力するので、そのコードをコピーして、テキストファイルに出力⇒テキストファイルの拡張子をSVGに変更→InkScapeで開くという動作を繰り返します。このやり方が流行れば、そんなWebサイトを作ってもいいかもしれませんね(時間があったら作ります)
縦線と横線は消してください。全体を外枠線で囲ってください。
外枠線が最後の項目まで覆われていません。外枠線の下端をもっと下に下げてください。
外枠線の高さを320にしてください。
一番下の「ユーザー情報」は削除してください。枠線高さを290に変更してください。
背景色を黄色にしてください
枠線の角を丸くしてください。
最終的に作成したSVGは以下の通りとなります。
<svg xmlns="http://www.w3.org/2000/svg" width="500" height="290"> <rect x="0" y="0" width="500" height="290" fill="#ffff99" rx="10" ry="10"/> <rect x="0" y="0" width="500" height="290" fill="none" stroke="#000000" stroke-width="1" rx="10" ry="10"/> <text x="50" y="30" font-size="16" font-weight="bold">列名</text> <text x="200" y="30" font-size="16" font-weight="bold">コメント</text> <text x="20" y="80" font-size="14">user_id</text> <text x="20" y="110" font-size="14">password</text> <text x="20" y="140" font-size="14">user_name</text> <text x="20" y="170" font-size="14">organization_id</text> <text x="20" y="200" font-size="14">sys_admin</text> <text x="20" y="230" font-size="14">session_limit</text> <text x="20" y="260" font-size="14">notification_level</text> <text x="150" y="80" font-size="14">ユーザーID</text> <text x="150" y="110" font-size="14">パスワード</text> <text x="150" y="140" font-size="14">ユーザー名</text> <text x="150" y="170" font-size="14">所属組織ID</text> <text x="150" y="200" font-size="14">システム管理者権限</text> <text x="150" y="230" font-size="14">セッションリミット数</text> <text x="150" y="260" font-size="14">通知を送るアラートレベル</text> </svg>
プロンプトの投入
プロンプトの効果を確かめるために「NewChat」を選択して、新しいチャットにします。
プロンプトは簡単で、以下の通りにします。このプロンプトをコピペして、ChatGPTに教え込むことになります
テーブル作成用のSQLスクリプト
create table mUserInfo(
vcUserId varchar(32) not null comment 'ユーザーID'
,vcPassword varchar(32) not null comment 'パスワード'
,vcUserName varchar(50) not null comment 'ユーザー名'
,intOrganizationId int not null comment '所属組織ID'
,tiSysAdmin tinyint not null comment 'システム管理者権限'
,tiSessionLimit tinyint not null comment 'セッションリミット数'
,tiNotificationLevel tinyint comment '通知を送るアラートレベル'
,primary key( vcUserId)
)comment='ユーザー情報';
を「テーブル構成SVG」で変換すると
<svg xmlns="http://www.w3.org/2000/svg" width="500" height="290">
<rect x="0" y="0" width="500" height="290" fill="#ffff99" rx="10" ry="10"/>
<rect x="0" y="0" width="500" height="290" fill="none" stroke="#000000" stroke-width="1" rx="10" ry="10"/>
<text x="50" y="30" font-size="16" font-weight="bold">列名</text>
<text x="200" y="30" font-size="16" font-weight="bold">コメント</text>
<text x="20" y="80" font-size="14">user_id</text>
<text x="20" y="110" font-size="14">password</text>
<text x="20" y="140" font-size="14">user_name</text>
<text x="20" y="170" font-size="14">organization_id</text>
<text x="20" y="200" font-size="14">sys_admin</text>
<text x="20" y="230" font-size="14">session_limit</text>
<text x="20" y="260" font-size="14">notification_level</text>
<text x="150" y="80" font-size="14">ユーザーID</text>
<text x="150" y="110" font-size="14">パスワード</text>
<text x="150" y="140" font-size="14">ユーザー名</text>
<text x="150" y="170" font-size="14">所属組織ID</text>
<text x="150" y="200" font-size="14">システム管理者権限</text>
<text x="150" y="230" font-size="14">セッションリミット数</text>
<text x="150" y="260" font-size="14">通知を送るアラートレベル</text>
</svg>
となる。以降テーブル作成用SQLを指示した場合には「テーブル構成SVG」で変換した内容を表示せよ。
作業の実行
create table mUserAuth(
vcUserId varchar(32) not null comment 'ユーザーID'
,intOrganizationId int not null comment '組織ID'
,bitsAuth bit(32) not null comment '権限'
,primary key( vcUserId,intOrganizationId)
)comment='ユーザー権限';
create table tUserSession(
vcUserId varchar(32) not null comment 'ユーザーID'
,vcSessionString varchar(50) not null comment 'セッション文字列'
,dtFirstTime datetime not null comment 'アクセス開始時間'
,dtLastTime datetime comment '最終アクセス時間'
,tiDeleteFlag tinyint comment '削除フラグ'
,primary key( vcUserId,vcSessionString)
)comment='ユーザーセッション情報';
create table mUserNotification(
vcUserId varchar(32) not null comment 'ユーザーID'
,tiNotificationType tinyint not null comment '通知種類'
,vcAddress varchar(50) not null comment '通知先'
,tiOrder tinyint comment '通知種類内連番'
,primary key( vcUserId,tiNotificationType,vcAddress)
)comment='ユーザー通知先';


コメント
コメントを投稿